
Are you a fan of sharp knives that can cut anything? Using dull knives can be really stressful, especially if you are preparing for a feast. But did you know that sharpening a knife has a proper technique? You must know what type of knife you have to avoid damages while sharpening. Remember that there are two types of knives: single-bevel and double-bevel knives. And in this article, we will focus on the single-bevel knife. We will reveal the proper technique of sharpening and the principles of using a single-bevel knife.
WHAT IS A TRADITIONAL SINGLE-BEVEL KNIFE?
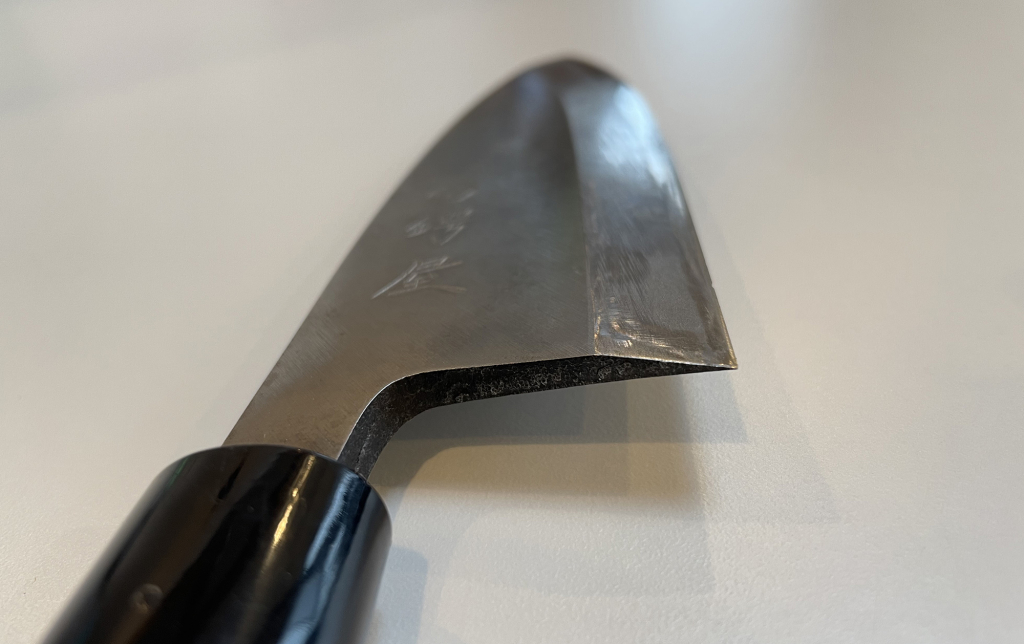
The traditional Japanese single-bevel knives are those with a bevel on the front called shinogi side and a concave back called uraoshi sides. The three most essential knife types are Deba, Yanagiba, and Usuba. According to use, these three knives have the same single-bevel geometry but can be sharpened slightly differently.
Single-bevel knives are asymmetrical and cannot be changed to the blade’s construction. When you are holding the knife in your hand, blade pointing away, edge down, and the shinogi line and bevel are on the right side, the knife is for right-hand use. But if the shinogi line is on the left, the knife is for left-hand use only. So be careful when purchasing a single-bevel knife, especially if you are a left-handed person. This is because lefty single-bevel knives are rare compared to right-handed knives.
PARTS OF TRADITIONAL JAPANESE SINGLE-BEVEL KNIFE
🔪 Uraoshi side
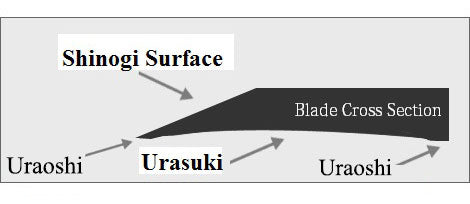
The backside of the knife is called the uraoshi side. This is the flat rim edge perimeter on the backside of a traditional Japanese knife. The uraoshi surrounds the urasuki or the integral concave shape on the backside of the knife. Without the uraoshi, the knife cannot be correctly sharpened to reach its full potential and will be brittle.
🔪 Urasuki side
The purpose of the urasuki is to minimize the food sticking to the blade. This will reduce the drag while slicing and also helps with sharpening. The rim of urasuki needs to be perfectly flat and level in order to have its full effect. Furthermore, this perimeter is essential because it enhances the strength of the blade on the edge of the knife as well as aligns the unbalanced parts on the backside. Traditionally, the urasuki is made on the big Japanese sharpening wheels and cannot be sharpened or ground at home.
🔪 Shinogi side
The shinogi side is the front side of the knife. It is the ridge or the line in between the upper flat blank area of the knife and bevel.
SINGLE-BEVEL’S ADVANTAGE
The asymmetrical blade design helps with many special sushi-specific cutting techniques like Half-angle. The cutting edge angle is flat in the backside at zero degrees and on the frontside is around 15 degrees. Because of that, a single-bevel knife can also be thicker at the spine and still highly sharp due to its very low sharpening angle.
DISADVANTAGES OF SINGLE-BEVEL KNIVES
When you first start using Japanese traditional single-bevel knives, you should adapt the different cutting techniques. This is because slicing with this kind of knife profile has the tendency to get drawn from the middle inward away from the shinogi side. How the knife was made and the maker’s attention to detail is sometimes not so evident on the first look. But when you begin sharpening it, you can encounter huge differences between their materials.
THINNING Vs. SHARPENING
Thinning (or grinding) and sharpening are part of the same process. When you are sharpening a single-bevel knife, you are removing steel material toward the shinogi line. The rule is to raise the shinogi line by the same amount as the damage you must remove from the edge. If this is done correctly, it means that even after countless sharpening sessions, your blade geometry will stay precisely the same, and its performance will not be affected.
WHETSTONES FOR SHARPENING
If you are buying a knife from an experienced knife dealer, ask for advice about whetstones. There is no general rule on what type of stones to use, especially when discussing a Kasumi-finished knife. The Kasumi is presented in your knife that’s hazy and usually on soft steel. This is in contrast to the polished carbon steel cutting edge. And by testing different stones with the same grit, the results may vary.
SHARPENING SETUP (GRITS)
It is advisable for a sharpening set up to have a good stone flattener because the sharpening stones have to be stable and lay flat. You will also need a good rubber stand or dressing stone. Another thing that is not so common is to have a leather strap. This can also be present to complete your setup.
For the grit, you will need two to three stones. Depending on your knife, you can choose from fine, medium, or coarse stones. Another optional thing is to have a diamond flattening plate, for example, 400 grit. But in the case of more significant damage on the blade, you can also use it as the initial coarse grit stone. For higher grits of about 5000, you can start using Japanese natural stones because these are essential to bringing out the beauty of steel and forging characteristics.
BASIC SHARPENING GUIDE
🔪 Preparation
First, put the whetstone underwater and let it soak until no air bubbles come out. When there are no air bubbles, the whetstone is ready to use. Place the whetstone on a flat and stable surface.
🔪 How to set a knife
Hold the handle of the knife tightly with your dominant hand. The blade should be facing towards you at a 45-degree angle. Place the knife so that the surface of the blade from the edge to the shinogi line is touching the whetstone. Then, tilt the knife until there is no space between the whetstone and the edge.
🔪 Sharpening a knife
Put your other hand on the section of the blade that you are sharpening and hone the knife. Glide the blade back and forth about 20 times per spot and use the entire length of the whetstone. Make sure to keep the angle steady and apply small amounts of water as necessary to prevent the whetstone from drying and scratching your knife.
The polishing slurry is produced when sharpening knives and is a liquid necessary for sharpening the knife, so do not wash it away. To properly sharpen the knife, sharpen the heel first. Then, sharpen the middle of the blade. And lastly, sharpen the tip of the blade. Hold the blade slightly upright so that the point of the blade is touching the whetstone.
🔪 Special notes (Burr)
You will see a rough burr on the edge as you sharpen the knife. Hone the knife until the entire edge has a burr. Then, flip the knife and remove the burr. Hold the blade so that the spine is perpendicular to the whetstone. Make sure the blade doesn’t lift and lay flat on the whetstone. Hone the knife lightly from the tip to the heel about ten times to remove the burr.
Use a finishing whetstone to complete the sharpening of the knife. Remove the slight burr on the surface, and you are done. After you are finished, rinse the knife with water. Wipe it with a dry cloth and store the knife dry. Performing this process once every two to three weeks will ensure the knife remains sharp.
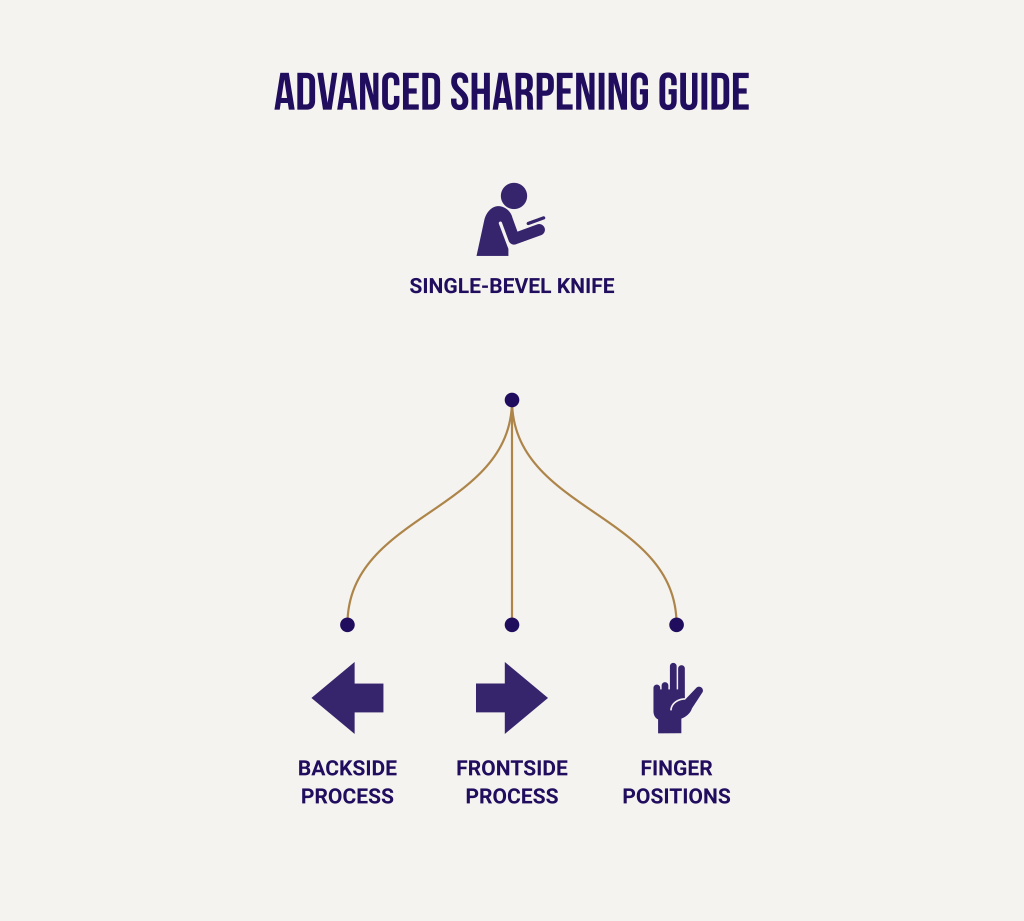
ADVANCED SHARPENING GUIDE: Things To Keep In Mind
Japanese traditional single-bevel knives are deeply connected with traditional Japanese cutting techniques and cuisine. Sharpening and polishing these knives also has strong roots in Japanese sword care, where conventional natural sharpening stones play a crucial role. Art and technique are infinitely compounded, so you must know the detailed sharpening techniques despite being passionate about them.
🔪 BACKSIDE PROCESS
Before starting any kind of sharpening, you have to protect the handles, mainly on Japanese knives, because they can get very dirty quickly. It is advisable to start sharpening on the backside. There is a good reason for this. Usually, we sharpen dull knives, which means the edge went through some abuse and is now damaged. Typically, dull knives are not straight and have tiny chips, dents, and small rollovers. These knife injuries have to do with the single-bevel geometry on the blade, being slightly different, and the tendency is for this damage to appear more on the backside.
🟢 Oversharpening
By starting at the back, we minimize the amount of steel that needs to be removed because it can slightly push the rollovers and dents back. Despite starting on the backside, you must not over sharpen this side because the integral concave must stay in place as long as possible over the knife’s countless sharpening sessions.
🟢 Direction
You must sharpen this side of the knife on a thousand grit, and the stone has to be totally flat. Place the fingers as close to the edge as possible and lightly press when pulling the blade towards you. The downforce has to be where the damage is, and the sharpening towards you will help to unroll the edge. Also, the damage and scratches to the stone will be less when pulling. However, this sharpening phase is extremely short, and every extra stroke is unnecessary. Remember that you must preserve the concave part of the knife. And as soon as you feel the rolled-over edge is not biting into the stone, it’s enough.
🟢 Blade placement
Placement of the blade on the stone is also very important, and holding the knife parallel all the way starting from its heel to the tip is the most significant position. By doing this, we make sure the concave part is correctly aligned through the entire length of the blade. That means you will have a better cutting performance.
🔪 FRONTSIDE PROCESS
The sharpening of the front side is the main business. This is for sharpening the entire steel section between the shinogi ridge and edge. When you are sharpening a new knife, be sure to check for high and low spots. These spots will be easily detected when you start sharpening and take extra effort to remove them because that will be your best foundation for much better sharpness.
🟢 Edge
There are two types of traditional edge: full convex edge/clamshell and flat edge.
The clamshell is integrated from two or three different types of bevels: soft iron, hard steel, and optional micro bevel. This is harder and more complex to sharpen, but it is more robust, with a less brittle edge. Lastly, it also lessens food sticking.
The flat edge is shown from the shinogi line to the edge of the optional micro bevel. This is easier to sharpen and has a thinner edge making it sharper than the clamshell. But because of having a thin edge, it is more brittle and prone to damage.
🔪 FINGER POSITIONS
When sharpening a single-bevel knife, you need to use three-finger positions with pressure on the other side of the shinogi, the tip, and the edge. But if the kife’s edge is flat, use only the middle position of the fingers.
FREQUENTLY ASKED QUESTIONS
🟡 Is it necessary to use fancy equipment to sharpen a knife properly?
You don’t have to buy expensive tools to sharpen your knife. You can use a brick, a whetstone, and a mat to complete your setup. But if you really want to preserve your knife, especially Japanese knives, it is advised to follow the grit rules when sharpening them.
🟡 Do only professional chefs hand sharpen the knives?
Knife sharpening is all about willingness to try. If you are willing to experiment, you will be able to sharpen your knife. Even if you are not a professional chef, there are no limitations in using a knife.
🟡 Is it necessary to flatten the whetstone?
If you are a sushi chef and sharpening Yanagiba’s to make a living from it, this doesn’t seem applicable to you. You don’t have to make your stone flat every single time. There are certain cases that you need to do that, but if you are sharpening in the kitchen, you don’t have to worry about flattening your stone.
🟡 Do you have to thin a knife at every sharpening?
Though thinning and sharpening have the same process, their goals are different. Thinning is done if you want to reduce the width and weight of the bevel for improved cutting performance. While sharpening is done and focused only on the end of the blade where the direct contact of food happens. So depending on your goal, it is not necessary to over-thin your knife because this can cause brittleness and breakage.
BOTTOM LINE
Remember that we can sharpen only the flat perimeter. Before starting to sharpen, please examine your back and front side. There are many single-bevel-looking knives out there with no concave area on the backside. Due to the emerging interest in knives, there are some sellers who offer only replicas. So it is better to consult a knife expert before purchasing a knife.
Lastly, sharpening a knife is a must but not frequent. Proper maintenance must be adapted if you want to make your knife live for years. Knives become dull if you always keep them in your cabinet, not totally dry. This can accumulate rust that can damage your knife. So always wipe your knife with a clean cloth before and after use.
To know more about cutlery sets, click here.