
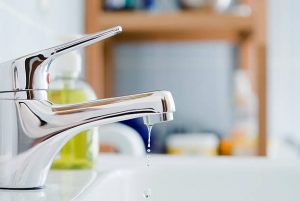
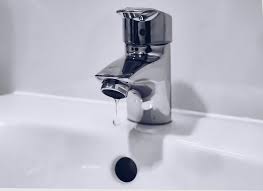
Have you ever encountered a leaking kitchen faucet? When you close down the faucet, it is still dripping. The dripping sound is very annoying, and in the long run, you are wasting water. To fix a leaking kitchen faucet is simple as long as you know the type of faucet you are about to handle.
Generally, there are three types of kitchen faucets: compression, ball type, ceramic disk, and cartridge faucets. The compression faucet will start leaking when the rubber washers on the valve seal wear out; hence need replacement. The ball type, ceramic disk, and cartridge faucets depend on the O-ring and neoprene seal to hold back the leak.
This article has comprehensive procedures on how to fix a leaking kitchen faucet. You will get explained the steps to fix each type of kitchen faucet. Before you start working, cover the sink and drain with a sheet of cloth to hold all removed faucet parts. Also, tape the wrench’s jaw with duct tape to prevent scratching the faucet fixtures.
How To Fix a Leaking Cartridge Kitchen Faucet
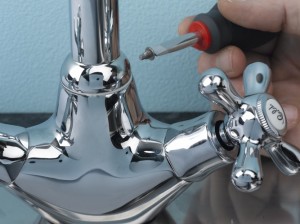
Step 1. Use a screwdriver to open the handle screw, then push the handle backward and remove it. Remember to remove the decorative cap usually on top.
Step 2. Use needle-nose pliers to remove the retaining clip holding the cartridge in line. After that, remove the cartridge by pulling it upwards.
Step 3. Disconnect the spout and use a knife to cut the old O-rings. Then apply the heat-protective grease on the new O-rings and attach them to the cartridge.
Step 4. Carefully reassemble the whole faucet and ensure the length of the old faucet matches the new faucet.
How To Fix a Leaking Compression Kitchen Faucet
Step 1. Use the knife to remove the top decorative cap on the faucet. Then use a screwdriver to remove the screw holding the handle.
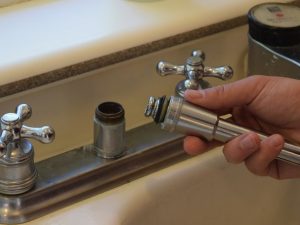
Step 2. Take an adjustable wrench and use it to disconnect the stem from the body. On the other hand, use a crescent wrench to loosen the packing nut.
Step 3. Turn the stem upside down and unscrew the rubber washers at the bottom. Then remove old seat washers and replace them with new ones. Keep in mind to apply the heat-proof grease on washers before fixing them.
Step 4. Disconnect the stem from the packing nut, cut off the old O-ring, and replace it with a new one. O-rings for compression faucets are complicated and need a perfect match with the faucet. Also, apply the plumber’s grease before replacing the O-ring.
Step 5. If your compression faucets continue to leak, the problem is with the retainer. The retainer is the disk that holds the washers. Grind the original retainer and replace it with a retainer ring. You can replace the retainer seat when you see it is impossible to repair.
How To Fix a Leaking Ceramic Disk Kitchen Faucet
Step 1. Twist the top cap with a knife to remove it, and you will see some screws holding the handle. Use a screwdriver to unscrew the handle and pull it off.
Step 2. You will see another cover called the escutcheon, remove this cover and find a set of screws holding the cylinder. Unscrew the cylinder and pull it out.
Step 3. Use a flat screwdriver to remove neoprene seals from the cylinder. Inspect and see if they are damaged; replace them when necessary.
Step 4. Use vinegar and a sponge to clean the cylinder opening and rinse it in running water.
Step 5. Reassemble the faucet after replacing the seals. Turn the handle to the “ON” position and switch on the water slowly, or else the pressure can crack the ceramic disk. Consider replacing the whole cylinder when leaking persists.
How To Fix a Leaking Ball Type Kitchen Faucet
You should note this type of faucet has many parts that can cause leaking. So the best solution is to buy a full replacement kit and fix it on the faucet system.
Step 1. Use a knife to remove the cover, and you will see a hex-head screw. Use a hex-key wrench to open the screw and disconnect the handle.
Step 2. You will find the cap and collar; use adjustable pliers to remove these two parts. Then you will see the faucet cam, which requires a unique tool in the repair kit to remove it.
Step 3. Slowly pull up the faucet cam, and it will come out with a cam washer, including the rotating ball.
Step 4. Use needle-nose pliers to pull out the rubber seals and springs from the faucet body. Then attach new rubber seals on a pencil or a wooden stick and get them down the faucet body. Do the same when installing the springs and other seals.
Step 5. Put back the stainless steel ball and align the keyway with the tab in the body. Remember to replace the rubber gasket, and cam cap found immediately on top of the ball. Align the cap with the next slot and tighten the top cap onto the faucet. Tighten until the steel ball gets proper tension.
Do You Want Your Kitchen Faucet To Have a Longer Useful Life?
Of course, everybody wants their kitchen faucets to stay for long, but you should keep a few things in mind. Below are some of the main care and maintenance tips for a kitchen faucet.
1. Clean the Faucet
Cleaning is part of the daily maintenance practices for a kitchen faucet. Use a damp cloth and mild soaps to clean the faucet. You can use window cleaners to clean the faucets. Follow the instructions on the cleaning detergent to avoid destroying the finish on the faucet. If you have the stainless steel, use furniture polish to keep it shiny like in the showroom.
Hard water can create mineral deposits on the faucet. Try your best and also clean such mineral deposits. Use an abrasive scrub and mild soaps to remove these deposits. Other sources recommend using vinegar because it is environmentally friendly. Use a special cleaner with a unique faucet finish to avoid damaging the excellent finish.
2. Always Inspect the Aerator
An aerator is a part that allows air and water to mix; as a result, the flaw will be smooth. This part is vulnerable to mineral deposits and other debris, requiring periodic cleaning. You can replace the aerator when it gets very dark due to the accumulation of minerals. Use a toothbrush and vinegar to clean the aerator and reinstall it.
3. Call a Professional
You can easily fix some simple problems but consider calling a professional when you run out of ideas. To fix a leaking kitchen faucet can be challenging, and call a plumber in such cases. A plumber has the required skills and tools to handle all faucet issues. This is an expensive care solution but will make your faucet stay for many years.
4. Lubricate the Faucet
The rubber rings and O-rings require periodic lubrication, or else they will wear out in a few months. Simply disassemble the faucet and apply the plumber’s grease on the faucet parts, including the handle. Doing so will reduce friction and prevent the burning of rubber parts. Use the following steps to lubricate a faucet.
Step 1. Make sure you turn off the main water supply before starting working on the faucet.
Step 2. Use a pen knife to remove the decorative cap, and you will see several screws that hold the handle. Use an Allen wrench to open the screws and remove the faucet handle.
Step 3. Now open the nuts holding the faucet stem in place using the taped wrench. Pull the stem out of the body.
Step 4. Clean the cartridge, seals, and O-rings, then lubricate them with the plumber’s grease. Reinstall all these parts after lubrication.
Step 5. Reassemble the faucet after lubrication and ensure all parts are also clean. Please lubricate the faucet handle because it is always in constant movement.
Conclusion
Now you wonder which one is the best way to fix a leaking kitchen faucet. But it is simple if you consider the type of kitchen faucet you have. Compression faucets need rubber seals any time you see such kitchen faucets leaking. The ceramic disk and cartridge faucets will leak when the O-rings wear out. But the ball-type faucet is complicated and requires a full repair kit.