
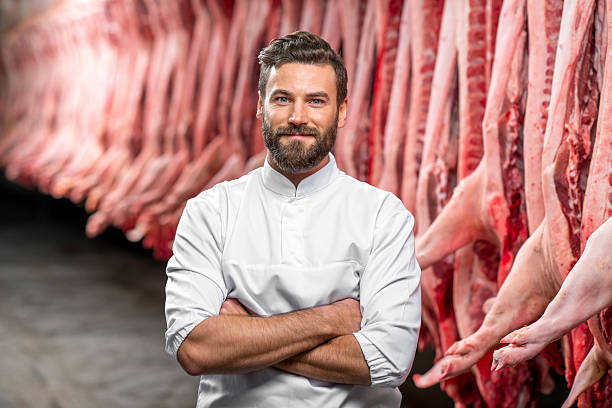
If you’re one of those home cooks who love to tackle big projects in the kitchen, you might be thinking about taking on the task of butchering your own meat. After all, there’s no denying that there’s a certain satisfaction that comes with being able to break down an entire animal into its component parts. Plus, it can save you a lot of money in the long run. But do you know which is the best knife for butchering deer?
If not, don’t worry. We’re here to help. In this post, we’ll share with you everything you need to know about choosing the best knife for the job, as well as some tips and tricks for getting the most out of your butchering experience. So, whether you’re a seasoned pro or a complete novice, read on for everything you need to know about butchering deer like a pro.
What Is Butchering?
You might be thinking, “Isn’t butchering just cutting up meat?” But the answer is a little bit more complicated than that. Butchering is actually the process of breaking down an animal into its component parts, which can then be used for different purposes. It includes removing the edible meat from the carcass, as well as preparing the meat for further processing (such as grinding or curing).
There are a few different ways to approach butchering, but the most common method is to first remove the major cuts of meat (such as the haunches, shoulders, and neck) and then break down those pieces into smaller cuts (such as steaks, roasts, and ground meat).
Why Would I Want to Butcher My Own Meat?
Now that we’ve answered the question “what is butchering?” you might be wondering why you would want to do it yourself. After all, it’s not exactly a casual weekend activity. So why bother? There are actually a few good reasons to consider butchering your own meat, even if you’re not a professional chef. Here are a few of the most compelling ones:
✔You’ll Save Money
Buying meat in bulk and butchering it yourself is almost always cheaper than buying pre-cut meat from the grocery store. That’s because butcher shops and supermarkets mark up their prices to cover the costs of labor, packaging, and other overhead expenses.
And, if you’re able to find a good deal on a whole animal (such as through a local farmer or a specialty meat market), you can save even more money. Just be sure to factor in the cost of any equipment you’ll need to purchase, as well as the time and effort required to do the butchering yourself.
✔You’ll Know Where Your Meat Comes From
If you’re concerned about the quality of the meat, you’re eating, butchering your own can be a good solution. That’s because you’ll know exactly where your meat comes from, and you can be confident that it hasn’t been treated with any harmful chemicals or hormones.
Plus, if you choose to buy your meat from a local farmer or ranch, you’ll also be supporting the local economy. And that’s always a good thing. You’ll get to choose the cuts you want. When you butcher your own meat, you’ll have a lot more control over which cuts you end up with. That means you can choose to make steaks out of the best pieces of meat and use the trickier bits for stews or ground meat.
✔You’ll Be Able to Customize Your Cuts
When you butcher your own meat, you’ll have complete control over how the final product is cut and packaged. That means you can tailor the cuts to your own preferences or even to the specific recipe you’re planning to use.
For example, if you’re making a stew, you might want to cut the meat into larger chunks. Or, if you’re preparing a steak dinner, you can have the butcher shop cut your steaks to the exact thickness and size that you want. Either way, you’ll be able to make sure that your meat is cut exactly the way you want it.
✔You’ll Get More Out of Your Animal
If you’re a hunter or a fisherman, butchering your own catch can be a great way to get more value out of your hard work. Not only will you save money by not having to pay someone else to do it, but you’ll also get to enjoy the satisfaction of knowing that you used every last bit of the animal.
Of course, butchering an animal is a lot of work. So if you’re not up for the challenge, you can always donate your catch to a local food bank or soup kitchen. They’ll be more than happy to put it to good use.
✔You’ll Learn a New Skill
Butchering meat is a valuable skill that has been passed down through generations of families. And, even if you don’t plan on making a career out of it, learning how to do it can be a fun and exciting experience.
Plus, once you know how to butcher meat, you’ll have a new skill that you can use to impress your friends and family. They’ll be amazed at your ability to transform a whole animal into delicious steaks, chops, and ground meat. And who knows? You might even inspire them to try butchering their own meat.
Tools of the Trade of Butchering
Whether you’re a professional chef or a casual hobbyist, there are specific tools that you’ll need to butcher meat properly. Knowing which tools to use and how to use them is an essential part of the butchering process. So here are a few of the essential tools you’ll need:
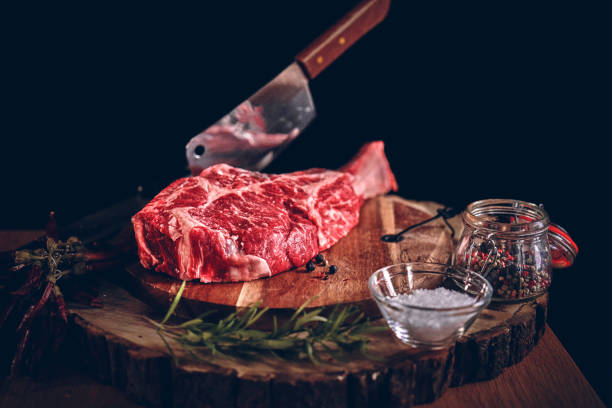
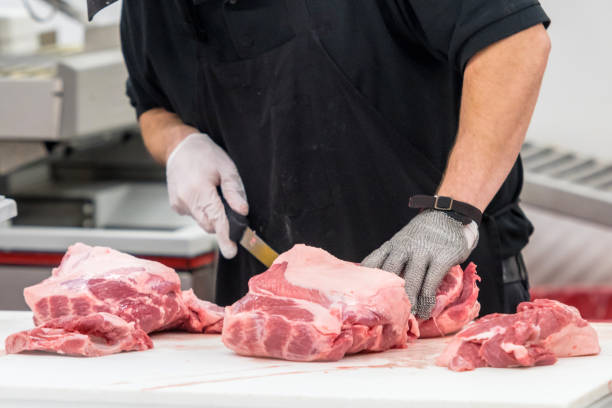
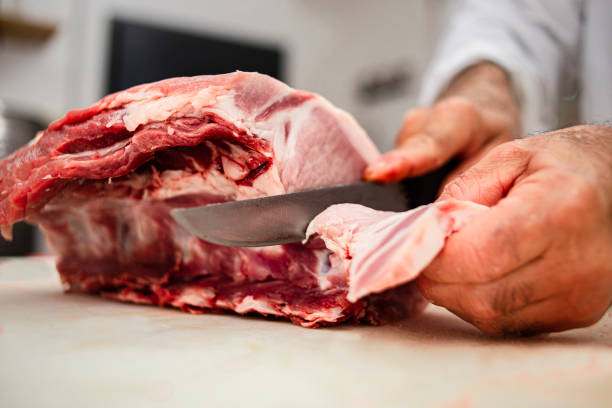
◼A Sharp Knife
One of the most essential tools for butchering meat is a sharp knife. A dull knife will not only make the job more difficult, but it can also be dangerous. After all, you don’t want your knife slipping and slicing into your hand.
So, before you start butchering, take a few minutes to sharpen your knife. If you don’t have a sharpening stone, you can use a honing rod or even a piece of sandpaper. Just be sure to get your knife nice and sharp before you start cutting.
◼A Cutting Board
Another essential tool for butchering meat is a cutting board. A good cutting board will provide a stable surface for you to work on, and it will also protect your countertops from getting scratched up.
When choosing a cutting board, look for one that is made of hardwood or bamboo. Avoid boards that are made of softer woods, like pine, as they will be more likely to absorb moisture from the meat and bacteria.
◼A Cleaver
A cleaver is a large, heavy knife that is designed for chopping through bone. If you don’t have a cleaver, you can use a large chef’s knife or even a hatchet. Just be sure to use caution when wielding such a large and powerful weapon.
That said, a cleaver is a handy tool to have if you plan on doing a lot of butchering. It will make short work of any bones you need to chop through, and it can also be used to tenderize meat.
◼A Boning Knife
A boning knife is a smaller, more maneuverable knife that is designed for removing meat from the bone. If you don’t have a boning knife, you can use a small paring knife or even a fillet knife.
A boning knife is a very versatile tool, and it can be used for more than just removing meat from bones. It can also be used for trimming fat and removing sinew.
◼A Breaking Knife
A breaking knife is a large, blunt knife that is used for breaking down whole animals. If you don’t have a breaking knife, you can use a cleaver or even a large chef’s knife.
A breaking knife is an essential tool for any butcher, as it allows you to break down an animal into manageable pieces. Without a breaking knife, you would be stuck trying to cut through the animal with a smaller knife, which would be very difficult and dangerous.
Safety Equipment
Butchering meat can be a messy and dangerous job, so it’s essential to take the proper safety precautions. Here are a few pieces of safety equipment you should have on hand before you start butchering:
Gloves: Butchering meat can be a messy job, so it’s essential to protect your hands from all the blood and grime. Wear gloves while you’re working, and be sure to wash your hands thoroughly when you’re done.
Apron: An apron will protect your clothes from getting stained with blood. It will also help to keep your hands free while you’re working. Without an apron, you’ll likely find yourself constantly wiping your hands on your clothes, which can be a bit of a pain.
Eye Protection: The sound of a knife chopping through bone can be pretty loud, so it’s essential to protect your ears from all the noise. Wear earplugs or earmuffs while you’re working, and be sure to take them off when you’re done. That way, you won’t have to listen to the sound of your own screams echoing in your head.
Mask: A butcher’s mask will protect your lungs from all the dust that is created when chopping through bone. It will also help to keep your hair out of your face while you’re working. That said, a mask is not strictly necessary, and you can get by without one if you’re careful.
Safety Boots: Butchering meat can be a tricky business, so it’s essential to wear boots with good traction. It will help to prevent you from slipping and falling while you’re working. With that said, any type of shoe with good traction will do, so you don’t necessarily need to buy special butcher’s boots.
The Best Knife for Butchering Deer
Now that you know what type of equipment you need, it’s time to choose the best knife for butchering deer. There are a few things to consider when choosing a knife, such as the size, the shape, and the sharpness.
➣Size
The size of the knife should be proportional to the size of the animal you’re butchering. If you’re butchering a small deer, you won’t need a very large knife. However, if you’re butchering a large deer, you’ll need a larger knife to make the job easier.
➣Shape
The shape of the knife is also important. You’ll want to choose a knife with a sharp point so that you can easily puncture the skin of the animal. You’ll also want to choose a knife with a curved blade so that you can more easily follow the contours of the animal’s body.
➣Sharpness
The sharpness of the knife is perhaps the most essential factor to consider. A dull knife will make your job more complex, and it can also be dangerous. A sharp knife, on the other hand, will make your job easier and safer.
➣Weight
The weight of the knife is also essential. A heavier knife will be more difficult to control, but it will also be better suited for chopping through bone. A lighter knife, on the other hand, will be easier to control but won’t be as effective for chopping through bone.
➣Material
The material of the knife is also essential. A stainless steel knife will be more resistant to rust, but it will also be more difficult to sharpen. A carbon steel knife, on the other hand, will be easier to sharpen but more susceptible to rust.
How to Cut and Trim Meat Like a Pro
Now that you know how to choose the best knife for butchering deer, it’s time to learn how to actually use it. Here are a few tips for cutting and trimming meat like a pro:
👍Start with the hindquarters.
The hindquarters are the best place to start when butchering a deer. That’s because they’re the largest and most difficult cuts of meat to remove. By starting with the hindquarters, you’ll be able to get a feel for how to use your knife before moving on to the smaller cuts.
And by working your way from the hindquarters to the front, you’ll avoid getting any blood on the meat that you’re going to eat. So, not only will your meat be more appetizing, but it will also be safer to consume.
👍Remove the legs.
Once you’ve removed the hindquarters, the next step is to remove the legs. You can do this by cutting through the skin and meat that connects the leg to the body. Then, use your knife to sever the bone at the joint.
After that, you can remove the skin from the legs by cutting it away from the meat. Once the skin is removed, you can then begin to trim the meat. And when you’re finished, you should have four nice, clean cuts of meat.
👍Trim the fat.
Once you’ve removed the skin and bone, it’s time to trim the fat. Fat is not only unappetizing, but it can also be unhealthy. So, it’s best to remove as much of it as possible.
To do this, simply run your knife along the surface of the meat, cutting away any fat that you see. It’s best to err on the side of caution, as you can always remove more fat later if you need to.
👍Remove the tenderloins.
The next step is to remove the tenderloins. These are the long, thin strips of meat that run along either side of the spine. To remove them, first, make a lengthwise cut along each side of the spine.
Then, use your knife to loosen the meat from the bone. Once it’s loose, you can then carefully pull the meat away from the body. And when you’re finished, you should have two nice, clean cuts of meat.
👍Remove the ribeye steaks.
The next step is to remove the ribeye steaks. These are the large, thick cuts of meat that are located on either side of the spine. To remove them, first, make a lengthwise cut along each side of the spine.
Then, use your knife to sever the ribs at the joint. After that, you can carefully remove the meat from the body. And when you’re finished, you should have two nice, clean cuts of meat.
👍Remove the backstrap.
The next step is to remove the backstrap. It is the long, thin strip of meat that runs along the spine. To remove it, first, make a lengthwise cut along each side of the spine.
Then, use your knife to sever the bone at the joint. After that, you can carefully remove the meat from the body. And when you’re finished, you should have one nice, clean cut of meat.
👍Trim the meat.
Once you’ve removed all of the large cuts of meat, it’s time to trim the smaller pieces. To do this, simply run your knife along the surface of the meat, cutting away any fat or sinew that you see.
And when you’re finished, you should have a variety of different cuts of meat that are ready to be cooked and consumed. So make sure to cook them up soon and enjoy!
Basic Butchering Cuts
Now that you know how to trim and cut the meat like a pro, it’s time to learn about the different types of butchering cuts. Knowing which cut is best for your recipe will help you get the most out of your deer. Here are a few of the most popular butchering cuts:
●Chuck Roast
If you’re looking for a cut of meat that’s best suited for slow-cooking, then the chuck roast is a good option. It’s a large, tough cut of meat that benefits from being cooked slowly over low heat.
So, if you’re making a stew or pot roast, the chuck roast is a good choice. Just make sure to trim away any excess fat before cooking.
●Ribeye Steak
If you’re looking for a steak that’s packed with flavor, then the rib eye is a good choice. It’s a large, thick cut of meat that’s best suited for grilling or pan-frying.
Just make sure to trim away any excess fat before cooking. And when you’re ready to eat, make sure to cook it to your desired level of doneness. That way, you can enjoy a delicious, juicy steak that’s packed with flavor.
●Backstrap
If you’re looking for a lean, tender cut of meat, then the back strap is a good choice. It’s a long, thin strip of meat that’s best suited for grilling or pan-frying.
But because it’s a lean cut of meat, it can dry out quickly if not cooked properly. So, make sure to cook it to your desired level of doneness. And if you want to, you can also marinate it beforehand to help keep it moist and flavorful.
●Tenderloin
If you’re looking for an extremely tender cut of meat, then the tenderloin is a good choice. It’s a long, thin strip of meat that’s located along the spine.
And because it’s so tender, it’s best suited for quick-cooking methods like grilling or pan-frying. Just make sure not to overcook it, or else it will dry out quickly.
●Sirloin Steak
If you’re looking for a steak that’s packed with flavor, then the sirloin steak is a good choice. It’s a large, thick cut of meat that’s best suited for grilling or pan-frying.
But unlike the rib eye, the sirloin is a leaner cut of meat. So, make sure to cook it to your desired level of doneness. That way, you can enjoy a delicious, juicy steak that’s packed with flavor.
Advanced Butchering Techniques
If you want to take your butchering skills to the next level, then you can try your hand at some of the more advanced techniques. These techniques will allow you to get the most out of your deer, and they’ll also help you create a variety of different cuts of meat. To get started, check out these advanced butchering techniques:
◻Boning
If you want to create cuts of meat that are easy to cook and eat, then boning is a good option. It involves removing the bones from the meat, which will make it easier to cook and consume. To bone a deer, start by removing the legs and thighs.
Then, use a sharp knife to remove the meat from the bone. Once you’ve removed all of the meat, you can then cut it into smaller pieces that are easy to cook and eat.
◻Butchering Cuts
If you want to create different cuts of meat, then butchering is a good option. It involves cutting the meat into smaller pieces that are easy to cook and eat. To butcher a deer, start by removing the legs and thighs.
Then, use a sharp knife to cut the meat into smaller pieces. Once you’ve cut the meat into smaller pieces, you can then cook it any way you want. But remember, the smaller the pieces, the quicker they’ll cook.
◻Flaying
If you want to remove the skin from the meat, then flaying is a good option. It’s a quick and easy way to remove the skin, and it will also help you create more tender cuts of meat. To flay a deer, start by removing the legs and thighs.
Then, use a sharp knife to remove the skin from the meat. Once you’ve removed the skin, you can then cut the meat into smaller pieces that are easy to cook and eat. Just make sure to remove any excess fat before cooking.
◻Trimming
If you want to remove any excess fat or connective tissue, then trimming is a good option. It’s a quick and easy way to remove unwanted fat and tissue, and it will also help you create more tender cuts of meat. To trim a deer, start by removing the legs and thighs.
Then, use a sharp knife to remove any excess fat or tissue. After you’ve trimmed the meat, you can then cut it into smaller pieces that are easy to cook and eat. But remember, the leaner the meat, the quicker it will cook.
◻Wrapping and Storing
Once you’ve butchered the deer, it’s important to wrap and store the meat properly. Otherwise, it could spoil quickly. To wrap the meat, start by placing it in a large freezer bag. Then, remove as much air from the bag as possible before sealing it.
To store the meat, place it in the freezer and use it within six months. But if you plan on eating it sooner, then you can store it in the fridge for up to three days. Just make sure to cook it properly before consuming it.
Additional Tips for Butchering Success
To even further improve your butchering skills, keep these tips in mind:
Use a sharp knife: A dull knife will make butchering more complicated, and it could also lead to accidents. So, make sure to use a sharp knife when butchering your deer.
Be patient: Butchering takes time and practice. So, don’t get discouraged if you don’t get it right the first time. Just keep practicing, and you’ll eventually get the hang of it.
Ask for help: If you’re having trouble butchering your deer, then don’t hesitate to ask for help. There are plenty of resources available that can teach you how to properly butcher a deer.
Things to Avoid When Butchering
While there are plenty of things you can do to improve your butchering skills, there are also some things you should avoid. Here are a few things to keep in mind:
1️⃣Don’t rush.
Butchering takes time and patience. So, don’t try to hurry through it. Otherwise, you could make mistakes that will ruin the meat. And that would be a shame after all of your hard work.
2️⃣Don’t get frustrated.
Again, butchering takes time and practice. So, don’t get too frustrated if you’re not getting it right the first time. Just keep at it, and you’ll eventually get the hang of it.
3️⃣Don’t give up.
If you’re having trouble butchering your deer, then don’t give up. There are plenty of resources available that can help you. Just do some research, and you’ll eventually find what you’re looking for.
Ways to Use the Leftovers from Butchering
After you’ve finished butchering your deer, you might be wondering what to do with all of the leftover parts. Here are a few ideas:
●Make stock.
You can use the bones and organs to make a delicious stock. Just simmer them in water for a few hours, and you’re good to go. And if you don’t want to make stock right away, you can always freeze the bones and organs for later.
●Render the fat.
The fat can be rendered down into tallow. Just simmer it in water for a few hours and then strain it. Once it’s cooled, it can be used for cooking or soapmaking. And if you don’t want to render the fat right away, you can always freeze it for later.
●Make sausage.
The meat from your deer can be used to make sausage. Just grind it up and add your favorite spices. Then, stuff it into casings and cook it how you like. And if you don’t want to make sausage right away, you can always freeze the meat for later.
How to Store the Meat from Butchering
Once you’ve finished butchering your deer, it’s essential to store the meat properly. Otherwise, it could spoil quickly. To wrap the meat, start by placing it in a large freezer bag. Then, remove as much air from the bag as possible before sealing it.
To store the meat, place it in the freezer and use it within six months. But if you plan on eating it sooner, then you can store it in the fridge for up to three days. Just make sure to cook it properly before consuming it.
Tips for Keeping Your Butchering Area Clean
A clean butchering area is essential for food safety. So, here are a few tips to help you keep your butchering area clean:
✔Wash your hands often.
This one seems obvious, but it’s worth mentioning. Be sure to wash your hands often while butchering. And if you’re using gloves, be sure to change them often as well.
✔Keep things clean as you go.
As you’re butchering, be sure to keep everything clean. Wipe down surfaces often and wash your hands frequently. That way, you can avoid cross-contamination.
✔Disinfect your equipment.
After you’re done butchering, be sure to disinfect all of your equipment. It will help to prevent the spread of bacteria. And if you’re using reusable equipment, be sure to wash it thoroughly.
✔Throw away any scraps.
Any meat or organs that you don’t plan on using should be thrown away. Don’t leave them lying around as they could attract pests. And if you’re disposing of them in a garbage can, be sure to line it with a bag first.
✔Don’t let anything touch the floor.
This is important for food safety. Be sure to keep all of your butchering tools and equipment off of the floor. Otherwise, they could become contaminated. And that’s the last thing you want.
Sanitary Practices to Follow During and After Butchering
There are a few sanitary practices that you should follow during and after butchering. First, be sure to wash your hands often. And if you’re using gloves, be sure to change them frequently as well.
Another essential practice is to keep everything clean. Wipe down surfaces often and wash your hands frequently. That way, you can avoid cross-contamination. Finally, disinfect all of your equipment after you’re done butchering. It will help to prevent the spread of bacteria. And if you’re using reusable equipment, be sure to wash it thoroughly.
By following these practices, you can help to ensure that your meat is safe to eat. And that’s the most important thing. You’ll also be able to enjoy the process of butchering a deer much more if you’re not worrying about food safety. So, take your time and be sure to follow these practices. It’ll be worth it in the end.
Final Thoughts
Butchering a deer is a rewarding experience. Not only do you get to enjoy the meat, but you also get to learn about where it came from. And if you take your time and follow some simple tips, you can be sure that the process will go smoothly. Just remember to be safe, clean, and sanitary. That way, you can be sure that the meat is safe to eat. For more knife cutting tips and tricks, visit our website.